Agent SVN
Seamlessly integrate Subversion with your favorite IDE....
Seamlessly integrate Subversion with your favorite IDE....

The Agent SVN plug-in allows you to seamlessly integrate Visual Studio with Subversion.
Features of the plug-in include:
Below is a video showing Visual Studio, Agent SVN and Subversion in action:
Described below are the step required to get Agent SVN to work seamlessly with Visual Studio 2008 and Subversion.
As an introductory tutorial, it is recommended you follow these steps as described.
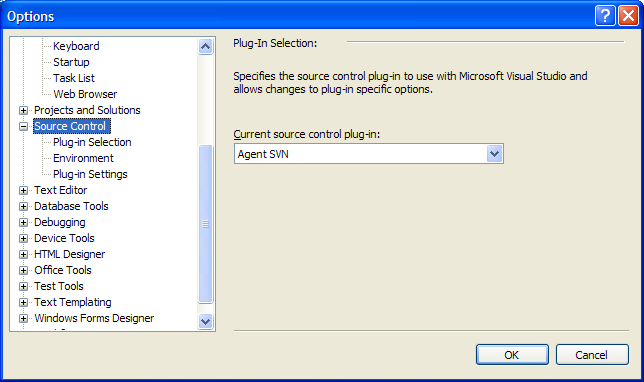
Inside Visual Studio use the Tools, Options menu and in the Source Control section select Agent SVN as the active provider.
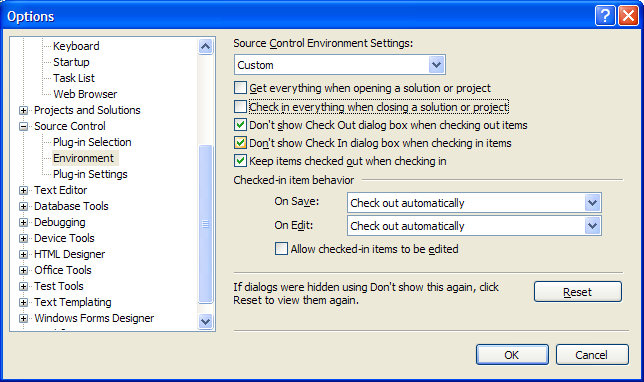
In the Environment section, configure the behaviour to suit.
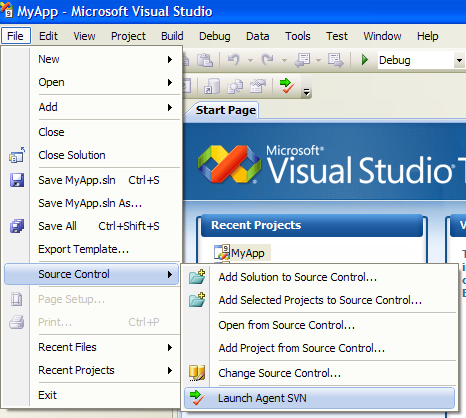
Use the File, Source Control, Launch Agent SVN menu to start the Agent SVN configuration utility to do the once off configuration of the plug-in.
For this initial testing use the Folder entry field to define the location of a local Subversion repository and select the Local File protocol as shown below:
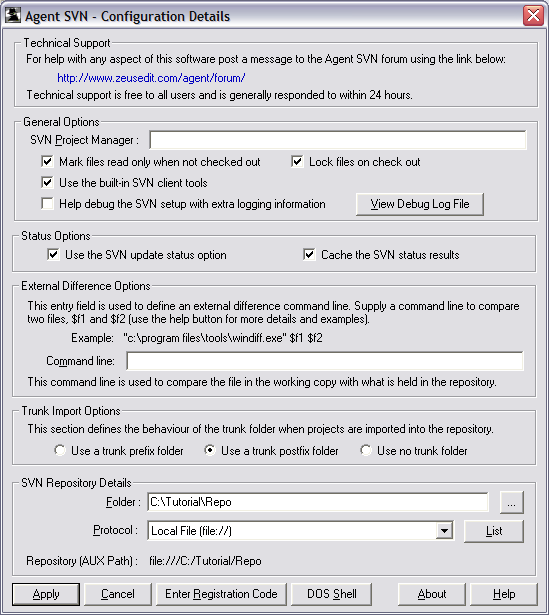
NOTE: It is highly recommended you start with this minimal configuration since this is by far the simplest Subversion configuration model.
This will give you an opportunity to become familiar with how the plug-in works and at a later point it will be easy to reconfigure Agent SVN to another repository location using a different protocol.
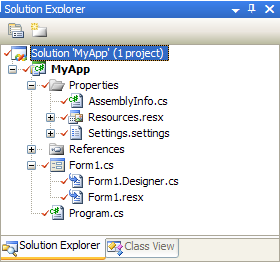
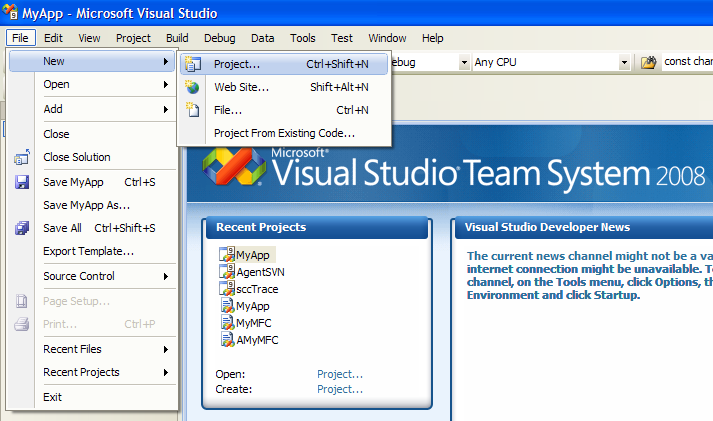
To see how Agent SVN works we need something to play with so the next step is to create a simple test solution.
From within the Visual Studio IDE create a simple solution as shown below:
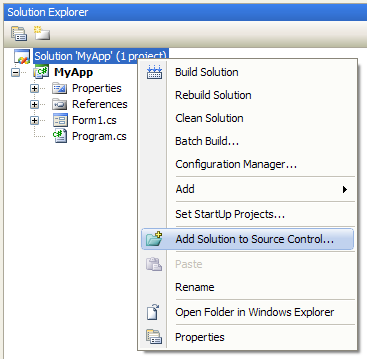
At this point, we have a new solution and we will use Agent SVN to import the solution into the Subversion repository (as was defined in step 2).
Because the local file protocol was selected you can be sure that this step will not be making any changes to your official Subversion repository.
NOTE: Agent SVN can also handle the case where the project already exists, but in that case, the project will need to be bound to the Subversion repository.
Use the menu shown below to import the solution:
The IDE will indicate that the files have been added as shown below:
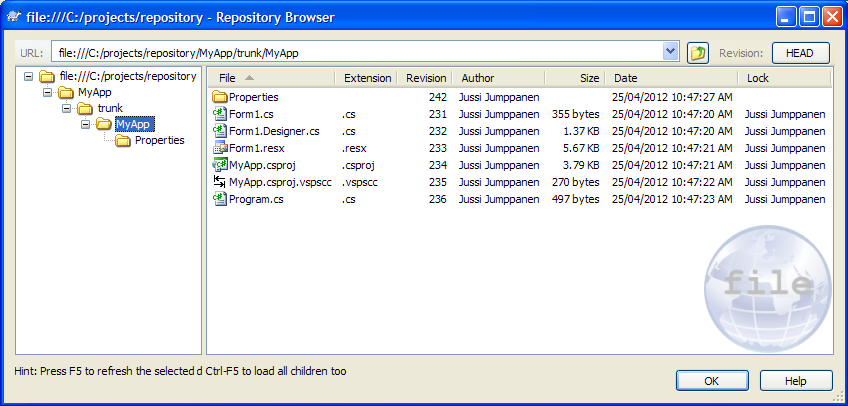
Use the repository browser to confirm the solution files are now inside the source control repository as shown below:
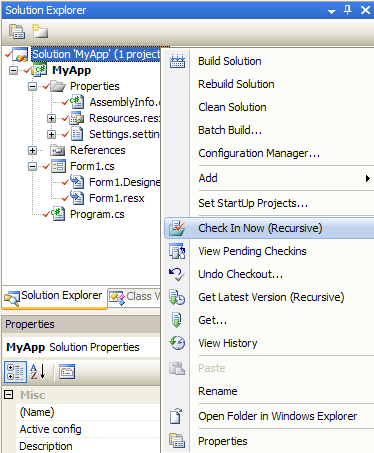
To complete the process check in all the files as shown below:
At this stage, the solution has been imported into the repository and the solution has been bound to the repository.
To access the source control from inside Visual Studio use the popup menu as shown below:
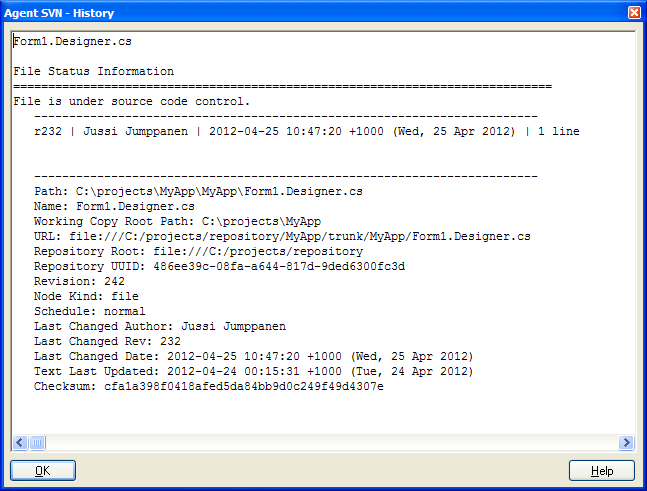
To check the solution bindings use the Show History menu on any of the files in the solution and the history dialog should be displayed as shown below:
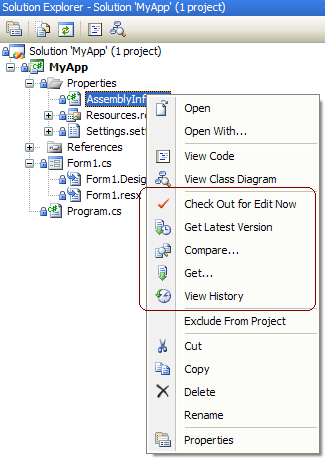
With the solution now fully configured, use the check out, check in, revert, compare or any of the other source control commands to manage the files in the solution.